


Photo editing with Ubiquity
This is the first release of the new image editor that has actual Ubiquity functionality. Yay. In my previous post I introduced a new JavaScript image editor based on my Pixastic image processing library and let you play around with a "static" demo version. Now I've made a few Ubiquity commands that lets you take the editor with you around the web and edit any image you want.
When the commands are executed a whole bunch of JavaScript is injected into the page which then takes care of setting up the editor, loading CSS, images, etc (about 100KB gzip'ed, everything included). All these assets are currently fetched from www.pixastic.com, maybe they'll eventually be bundled with Ubiquity.
Once you've got Firefox 3.5 and the Ubiquity extension up and running you can subscribe to the commands at http://www.pixastic.com/ubiquity/. This will add the commands![]() elements are supported, I don't know if support for background images will be added at some point. I'd also like some more UI feedback when in this "image selection" mode, and possibly allow for selecting an image with the mouse prior to command execution.
 Since the screenshots are always bigger than the image viewport in the editor, I've implemented some zoom functionality. There are just a few different pre-defined zoom levels and it doesn't allow for much zooming in, it's not very pretty anyway due to the interpolation when rescaling images in the browser. You'll see the current zoom level in the top left corner, some buttons or something for zooming in/out will be added later but for now you can use the mousewheel.
 So you'll notice in the "Done" tab that there's now also an "Upload to Flickr" option where, with just a few clicks, you can authorize the editor with Flickr and then upload your edited image. It shouldn't be too hard to figure out. An authentication window is opened where you'll have to grant Pixastic the necessary privileges, you then confirm the authentication back in the editor and if all is ok, you can then fill in a few image details and begin the upload. It's all a bit rough around the edges and it needs a bit more work, better feedback to the user, more image info fields, etc.
A feature I might try to implement is to register if the original image was loaded from a Flickr photo page and then ask if the user wants to update the existing image or just upload to a new one. That shouldn't be too hard, I think. And of course more destinations, maybe Facebook and also something like ImageShack for quick and simple image hosting. Most actions now let you apply them to a selected region of the image. Just drag a rectangular area on the image to make a selection. The selection stays active across actions until you click "Apply" on one of them, at which point the selection is reset.
 To reduce the risk of forgetting to click "Apply" after setting the parameters for an editing action, the "Apply" button is now highlighted when any of the parameters are changed. If there are no parameters, eg. the invert action, the button will always be highlighted just as it will be for those actions where there are no "non-image-changing" default parameters (for instance the "mosaic" action, no value for the block size will leave the image untouched).
If you still manage to move on to something else without committing your changes, you can simply go back to the action you came from and the settings should be intact and ready for you to apply. I hope that's a reasonable compromise but I'm open to suggestions on how to improve the process.
Be sure to let me know what you think. And since the web is such a hostile environment there might some pages where things get messed up, just give me links so I can check it out.
So, have fun, I know I will. That special Roskilde Festival type of fun! Back in a weeks time. Read more...
Before we start
You should only use this with Firefox 3.5, anything older will probably not work at all (at least it didn't last time I checked). I haven't looked too deeply into it but I'm not sure it's possible to make it work for earlier versions due to some changes in security concerning the canvas image data acccess. That said, even with 3.5 this is still in the alpha stage and things occasionally fail.When the commands are executed a whole bunch of JavaScript is injected into the page which then takes care of setting up the editor, loading CSS, images, etc (about 100KB gzip'ed, everything included). All these assets are currently fetched from www.pixastic.com, maybe they'll eventually be bundled with Ubiquity.
Once you've got Firefox 3.5 and the Ubiquity extension up and running you can subscribe to the commands at http://www.pixastic.com/ubiquity/. This will add the commands
edit-image and edit-screenshot to your Ubiquity arsenal. The latest beta of Ubiquity supports hyphen-less commands but doing "edit image" seems to get mixed up with a Flickr search.
Image editing
Theedit-image command lets you edit any image on any web page using the Pixastic editor. Just execute the command and click on the relevant image to load the editor. Currently only Screenshots and zooming
The other command,edit-screenshot, does pretty much what it says. It takes a picture of the current page (only the visible portion and no browser UI) and then loads the editor using that image.
Since the screenshots are always bigger than the image viewport in the editor, I've implemented some zoom functionality. There are just a few different pre-defined zoom levels and it doesn't allow for much zooming in, it's not very pretty anyway due to the interpolation when rescaling images in the browser. You'll see the current zoom level in the top left corner, some buttons or something for zooming in/out will be added later but for now you can use the mousewheel.
Image upload and Flickr
Ubiquity allows the editor to do stuff it wouldn't normally have access to (eg. taking a picture of the current page, editing images regardless of where they're hosted, etc) which means it is also possible to post the image to any destination such as photo hosting services and what not. An obvious one to implement was Flickr since it's widely used and has a nice and detailed API.
So you'll notice in the "Done" tab that there's now also an "Upload to Flickr" option where, with just a few clicks, you can authorize the editor with Flickr and then upload your edited image. It shouldn't be too hard to figure out. An authentication window is opened where you'll have to grant Pixastic the necessary privileges, you then confirm the authentication back in the editor and if all is ok, you can then fill in a few image details and begin the upload. It's all a bit rough around the edges and it needs a bit more work, better feedback to the user, more image info fields, etc.
A feature I might try to implement is to register if the original image was loaded from a Flickr photo page and then ask if the user wants to update the existing image or just upload to a new one. That shouldn't be too hard, I think. And of course more destinations, maybe Facebook and also something like ImageShack for quick and simple image hosting.
Other changes since last time
Most actions now let you apply them to a selected region of the image. Just drag a rectangular area on the image to make a selection. The selection stays active across actions until you click "Apply" on one of them, at which point the selection is reset.
To reduce the risk of forgetting to click "Apply" after setting the parameters for an editing action, the "Apply" button is now highlighted when any of the parameters are changed. If there are no parameters, eg. the invert action, the button will always be highlighted just as it will be for those actions where there are no "non-image-changing" default parameters (for instance the "mosaic" action, no value for the block size will leave the image untouched).
If you still manage to move on to something else without committing your changes, you can simply go back to the action you came from and the settings should be intact and ready for you to apply. I hope that's a reasonable compromise but I'm open to suggestions on how to improve the process.
Have fun
In case you missed it, you can find the Ubiquity commands here where you'll also have a few images to play around with if you're too lazy to find some yourself.Be sure to let me know what you think. And since the web is such a hostile environment there might some pages where things get messed up, just give me links so I can check it out.
So, have fun, I know I will. That special Roskilde Festival type of fun! Back in a weeks time. Read more...
Photo editing in the browser with Pixastic - revisited
 A bit delayed, some progress has been made on the new Pixastic powered photo editor which will eventually find its way into the Mozilla Labs Ubiquity project. Here's a first preview of how the editor is going to look. It's still very alpha-ish and in a stage where I'm just trying to get something up and running, so wear your hard hats.
In very few words, the current situation is that I have an editor application running on the Pixastic library (the one featured on the Pixastic site doesn't actually use the library). There's no Ubiquity version yet (or rather, there is but it blows up every other time I run it), but I've made a test page with a few images that you can play around with.
In a lot more words, the main goals for this editor are:
Some JavaScript files obviously need to be included (in Ubiquity's case, they're injected when the command is triggered) and in its current form the application is then loaded in an
When it comes to saving, there are a few different options. The first - and most obvious when editing an in-page image - is to simply save the image back to the page. This is done by generating a
But with the cross-domain XHR abilities available from Ubiquity it should also be possible to post the image to something like Flickr or maybe Facebook. I've only just started looking at Flickr integration and I don't actually know if the Flickr API will even accept the image data - the
At the moment it only works in Firefox but the aim is to have it working in all appropriate browsers. That means Opera 9.5+, Safari 4 (and Chrome once it gets
Read more...
A bit delayed, some progress has been made on the new Pixastic powered photo editor which will eventually find its way into the Mozilla Labs Ubiquity project. Here's a first preview of how the editor is going to look. It's still very alpha-ish and in a stage where I'm just trying to get something up and running, so wear your hard hats.
In very few words, the current situation is that I have an editor application running on the Pixastic library (the one featured on the Pixastic site doesn't actually use the library). There's no Ubiquity version yet (or rather, there is but it blows up every other time I run it), but I've made a test page with a few images that you can play around with.
In a lot more words, the main goals for this editor are:
Embeddable
I want it to be as easy as possible to embed into an existing page. This ties in with the goal to make accessible it via a Ubiquity command since this also means that it has to be all ninja like and there shouldn't be any trace of it post-edit. On the other hand, I'd also like it to replace the editor on http://www.pixastic.com/ so it should also run as a stand-alone app, but that shouldn't be a problem if the aforementioned criteria is met.Some JavaScript files obviously need to be included (in Ubiquity's case, they're injected when the command is triggered) and in its current form the application is then loaded in an
iframe where the DOM is filled and all the necessary CSS is loaded, keeping the editor separated from the page from which it was loaded.
Extendable
Well, it's based on Pixastic which is itself pretty easy to extend with new actions. Even though the internal API has a few flaws, it's easy and flexible enough that adding new actions and effects requires very little effort besides the actual image processing code. I'd like it to be just as easy to add new functionality to the editor so I'm working on a format that allows adding the most basic controls (text inputs, sliders, etc) with very little code but at the same is also flexible enough that you can create something like the cropping tool.Load and save from/to anywhere?
Loading images is done programmatically at the moment but is as simple as calling loadImage(image) where image is an HTMLimg element. It would be great if it was possible to load up images from anywhere (other websites, Flickr albums, local images, etc), but same-origin security restrictions limit us to accessing images from the same host. There should be more freedom when running from Ubiquity and that feature would be more useful to have in the general case.
When it comes to saving, there are a few different options. The first - and most obvious when editing an in-page image - is to simply save the image back to the page. This is done by generating a
data: URI and setting the src on the original image element. Second option is to save the image to the user's computer. This can be done by either making a link with the data: URI for the user to right click or by triggering a download dialog. The last option would seem like the best but in order to do that, the mime type of the data: URI has to be altered and it seems that Firefox is then unable to figure out the actual format of the image and defaults to giving it a .png extension, so that's only good for saving PNG images. I'd like to also take advantage of some browsers' ability to generate both PNG and JPG data: URI's so at the moment I'm not sure what to do. Any suggestions?
But with the cross-domain XHR abilities available from Ubiquity it should also be possible to post the image to something like Flickr or maybe Facebook. I've only just started looking at Flickr integration and I don't actually know if the Flickr API will even accept the image data - the
data: URI is base64 encoded and it would be nice to not have to mess around too much with it since it can be quite big. I'll also have to look into what other online photo services are accessible.
Skinnable
To some extent the editor should be skinnable but I'm not going out of my way to make every detail customizable. In terms of layout I'm sort of going with Aza Raskin's Lightroom inspired proposal, at least for now. I'm using jQuery UI as a base for the UI elements, so all the theming that comes with that should apply here as well. It will likely end with a compromise with a somewhat fixed layout but color schemes and so on can be changed via CSS and jQuery UI themes if need be.Feedback
At this point I'm very much looking for feedback on just about every aspect (features, UI, usability issues, etc.), but a couple of specific things I'm thinking about/that were brought to my attention are:- The undo feature: How does it work for you with the vertical bar? Is it in the right place? Should it stay hidden until there's actually something to undo?
- Preview: On or off by default? I've hesitated turning preview on by default since JavaScript image processing can still be a CPU intensive task (especially with large images), even with today's fast JS engines. If processing was instant, I would have no problem making "on" the default state. Maybe turning it on/off once should toggle it for all actions (ie. globally)?
- Apply: You have to actively click "Apply" before anything actually happens to the image. If you select another action/tab without clicking "Apply", your changes are lost, followed by much frustration. It's been suggested that all changes are applied right away (since you can just undo them). I'm not sure if that's the right thing to do due to the way the UI works right now, but that might just be me being used to the extra layer of confirmation. Perhaps it would be better if the button was highlighted in some way as soon as there are any changes that would be lost?
So many words
Ok, go on and play with the preview. When you're done, please let me know what you think.At the moment it only works in Firefox but the aim is to have it working in all appropriate browsers. That means Opera 9.5+, Safari 4 (and Chrome once it gets
[get|put]ImageData support in stable.
Read more...
A few Pixastic updates
A few minor updates to Pixastic before I begin working on the next edition of the photo editor (the one that will eventually also work as a Ubiquity command). Undo/revert functionality, a color histogram action, and more..
A few people have requested a way to revert the image back to the original, so Pixastic now remembers the original image and lets you call
After processing an image, the options object now holds the resulting canvas in a property called
The options object can now also take a boolean
Bill Mill did some color histogram code for his article series on canvas image processing. This code has now been integrated (and slightly modified for consistency with the brightness histogram). Thanks Bill!
Lastly, I made few performance improvements in some of the actions (brightness/contrast, color adjust, desaturate). More will come as I get around to it. Read more...
A few people have requested a way to revert the image back to the original, so Pixastic now remembers the original image and lets you call
Pixastic.revert(img) to undo all the processing done on an image. It's important to know that the resulting image from a process() call is not the same element as the one passed to the process() call. Pixastic creates a new canvas element which means that most properties, attributes and events are not carried over to the new canvas element. For instance, if you are making a mouseover/out effect on an image, you'll have to listen for the mouseout event on the new element after calling process() in the mouseover event. The example on the introduction page has been reworked to use this.
After processing an image, the options object now holds the resulting canvas in a property called
resultCanvas.
Example:
  var options = {};
  Pixastic.process(image, "action", options);
  options.resultCanvas; // <- holds new canvas
The canvas is also returned by the Pixastic.process() method itself, but only if the image is completely loaded by the time of the call (if it is not, the actual processing is deferred until the onload event on the image)
The options object can now also take a boolean
leaveDOM option that will leave the DOM untouched after processing. If not set (or set to false), Pixastic behaves as it did before and replaces the original image with the new canvas element. The new revert() method will also put the original image element back in the DOM, if possible.
Bill Mill did some color histogram code for his article series on canvas image processing. This code has now been integrated (and slightly modified for consistency with the brightness histogram). Thanks Bill!
Lastly, I made few performance improvements in some of the actions (brightness/contrast, color adjust, desaturate). More will come as I get around to it. Read more...
Pixastic to power Ubiquity photo editor
 I've been talking to Mozilla's Aza Raskin about a photo editor command for Ubiquity based on my Pixastic library. He posted an article today explaining what such an editor might look like, check it out! If you don't know what Ubiquity is, it's a really interesting extension to Firefox from Mozilla that lets you interact with your browser using typed commands.
Anyway, as the post says, I hope to begin working on the photo editor within a month so. Read more...
I've been talking to Mozilla's Aza Raskin about a photo editor command for Ubiquity based on my Pixastic library. He posted an article today explaining what such an editor might look like, check it out! If you don't know what Ubiquity is, it's a really interesting extension to Firefox from Mozilla that lets you interact with your browser using typed commands.Anyway, as the post says, I hope to begin working on the photo editor within a month so. Read more...
Photoshop blend modes with Pixastic
 I've added a new action to the Pixastic library called "blend". This action lets you blend two images using different blend modes like the ones available in Photoshop (multiply, screen, exclusion, etc.).
Check the demo page to see it in action.
Below are shown all the blend modes included. The images used are:
Base image:

Blend image:

So, basically all the Photoshop modes sans "dissolve" and the HSL based ones (which I guess I'll add at some point as well).
Read more...
I've added a new action to the Pixastic library called "blend". This action lets you blend two images using different blend modes like the ones available in Photoshop (multiply, screen, exclusion, etc.).
Example usage
var img = new Image();
img.onload = function() {
 var blendImg = new Image();
 blendImg.onload = function() {
  Pixastic.process(img, "blend",
   {
    amount : 1,
    mode : "multiply",
    image : blendImg
   }
  );
 }
 blendImg.src = "blendimage.jpg";
}
document.body.appendChild(img)
img.src = "myimage.jpg";
The image on which you apply the action will be considered the base image when blending. You can use either an img element or a canvas element for the "blend image". It expects the images to be the same size but will simply crop the blend image if it's too large or leave untouched areas if it's smaller then the base image.Check the demo page to see it in action.
Below are shown all the blend modes included. The images used are:
Base image:

Blend image:

Blend modes
Normal


Darken


Multiply


Color Burn


Linear Burn


Darker Color


Lighten


Screen


Color Dodge


Linear Dodge


Lighter Color


Overlay


Soft Light


Hard Light


Vivid Light


Linear Light

Pin Light


Hard Mix


Difference


Exclusion


So, basically all the Photoshop modes sans "dissolve" and the HSL based ones (which I guess I'll add at some point as well).
Read more...
Alternative edge detection filter
 Oliver Hunt decided to share some edge detection code (uncreatively named
Demo page
This is probably my last post before christmas, so happy holidays everyone! Read more...
Oliver Hunt decided to share some edge detection code (uncreatively named edges2 by me). The result is different from the two existing actions in Pixastic and it is also a bit faster. Nice. Thanks Oliver!Demo page
This is probably my last post before christmas, so happy holidays everyone! Read more...
More Pixastic actions
A few new actions (Color Adjust, Mosaic, Pointillize and Solarize) are now available for the Pixastic library (if you didn't catch the first post about it, go here), bringing the total count to 25.
The new effects are as follows:
Color Adjust
This simply lets you add/subtract from each color channel (red, green and blue) of the image. Demo page.
Mosaic
Creates a pixellated effect. Demo page.

Pointillize
Paints the pictures with circular... points. Demo page.

Solarize
Creates a solarisation effect by inverting all colors that are above a certain treshold. Demo page.

All of these need image data access, so Firefox, Opera 9.5+ and WebKit nightly only. Got a few more coming in the not so distant future.
Read more...
The new effects are as follows:
Color Adjust
This simply lets you add/subtract from each color channel (red, green and blue) of the image. Demo page.
Mosaic
Creates a pixellated effect. Demo page.
Pointillize
Paints the pictures with circular... points. Demo page.
Solarize
Creates a solarisation effect by inverting all colors that are above a certain treshold. Demo page.
All of these need image data access, so Firefox, Opera 9.5+ and WebKit nightly only. Got a few more coming in the not so distant future.
Read more...
Pixastic - Now a JavaScript image processing library
 So, a while ago I played around with applying different effects to images by using the canvas element. The result was a small library that I posted about here. A bit later, I took some of that code and turned it into a small image editing application that I dubbed Pixastic,
the most web 2.0 name I could think of. Now I've ripped out the filtering parts and turned it back into an image processing library, also called Pixastic.
You should check out the Pixastic site if you want the whole low down on what it does, but here's a quick summary. The Pixastic library allows you to apply a variety of effects or "actions" on an image. For most of the effects, the magic is done by painting the image on a
 This new library has its own site at http://www.pixastic.com/lib/ (the editor has been moved to http://editor.pixastic.com/).
There are live demos of all the actions in the documentation, as well as descriptions of parameters and all that.
Also, unlike the previous library, this code freely available under the terms of the MIT license.
Check it all out here
All feedback, bugreports, contributions, etc. are of course much appreciated.
Read more...
So, a while ago I played around with applying different effects to images by using the canvas element. The result was a small library that I posted about here. A bit later, I took some of that code and turned it into a small image editing application that I dubbed Pixastic,
the most web 2.0 name I could think of. Now I've ripped out the filtering parts and turned it back into an image processing library, also called Pixastic.
You should check out the Pixastic site if you want the whole low down on what it does, but here's a quick summary. The Pixastic library allows you to apply a variety of effects or "actions" on an image. For most of the effects, the magic is done by painting the image on a
canvas element and then accessing the raw pixel data via the getImageData and putImageData methods. Currently available actions are:
- Blur
- Brightness/Contrast
- Crop
- Desaturate
- Edge Detection
- Emboss
- Flip Horizontally/Vertically
- Glow
- Histogram
- Hue/Saturation/Lightness
- Invert
- Laplace Edge Detection
- Lighten
- Noise
- Posterize
- Remove Noise
- Sepia
- Sharpen
- Unsharp Mask
- Color Adjust
- Mosaic
- Pointillize
- Solarize
Pixastic.process(
 document.getElementById("myImage"),
 "blur",
 {amount:0.5}
);
And with CSS classes the same would be done like this:
<img src="myimage.jpg" class="pixastic pixastic-blur(amount=0.5)" />In the
canvas-less IE, the effects are applied (when possible) with the proprietary IE filters. There's also some basic jQuery support that you can read more about on the Pixastic site.
This new library has its own site at http://www.pixastic.com/lib/ (the editor has been moved to http://editor.pixastic.com/).
There are live demos of all the actions in the documentation, as well as descriptions of parameters and all that.
Also, unlike the previous library, this code freely available under the terms of the MIT license.
Check it all out here
All feedback, bugreports, contributions, etc. are of course much appreciated.
Read more...
Pixastic update - zoom, view source
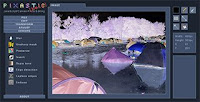 A small update to my online JavaScript photo editing app, Pixastic.com.
First, it is now possible to zoom in and out using either "Z" and "X" or the mousewheel. This also allows larger images to be loaded, so now the filesize limit is 4 MB and 2048x2048 px. You can also use the arrow keys to move the image around.
Second, the "Load from URL" function is still rather handicapped, since my hosting service is blocking most outbound connections, but you can now load pictures from Flickr, Photobucket, Picasa Web and Facebook. (Using rightclick and copy/pasting the address). At some point I'll probably look into some real integration with services like these.
Third, I've added the possibility to easily view the JavaScript source of all the different image actions. If you press shift while clicking on an action (like "Adjust" -> "Desaturate"), a small window will appear with the source. Alternatively, there is a small link in the action dialogs that you can click (only works for the actions with dialogs, obviously). You can also do this (shift-click) with the tool buttons on the right.
Try it out here
And if you didn't catch it the first time, this blog post explains a bit more about Pixastic. Read more...
A small update to my online JavaScript photo editing app, Pixastic.com. First, it is now possible to zoom in and out using either "Z" and "X" or the mousewheel. This also allows larger images to be loaded, so now the filesize limit is 4 MB and 2048x2048 px. You can also use the arrow keys to move the image around.
Second, the "Load from URL" function is still rather handicapped, since my hosting service is blocking most outbound connections, but you can now load pictures from Flickr, Photobucket, Picasa Web and Facebook. (Using rightclick and copy/pasting the address). At some point I'll probably look into some real integration with services like these.
Third, I've added the possibility to easily view the JavaScript source of all the different image actions. If you press shift while clicking on an action (like "Adjust" -> "Desaturate"), a small window will appear with the source. Alternatively, there is a small link in the action dialogs that you can click (only works for the actions with dialogs, obviously). You can also do this (shift-click) with the tool buttons on the right.
Try it out here
And if you didn't catch it the first time, this blog post explains a bit more about Pixastic. Read more...
Pixastic : Photo editing with JavaScript and canvas
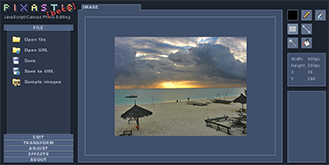
I wanted to see how far I could take the canvas image effects and the result, which is still very much a work in progress, is pixastic.com, a JavaScript/Canvas image editing application.
Now, it's not a complete photo manipulation and editing suite, capable of doing everything you need, nor does it aim to be that. There is no substitute for Photoshop. So, first and foremost Pixastic will be my playground for experimenting with image manipulation, and I suppose also a showcase of how the canvas element can be used to edit photos. Every bit of manipulation is done on the client side with no plugins, using just JavaScript and the functionality present in the canvas implementations of the supported browsers. Now, even if its primary goal is that of being a technical curiosity, I think it can also turn out a handy and usable tool if you have online photos or other images that need a quick edit of some sort.
Many typical transforms like cropping, resizing, rotating are available just as a variety of image filters allows standard adjustments and effects such as brightness/contrast, hue/saturation, grayscale, sepia toning, emboss, blur and so on. There are also some (very) simple drawing capabilities which I plan to expand in the future.
It has some obvious crossbrowser issues due to the usage of the canvas element, which is not available in Internet Explorer. Firefox, Opera and Safari all work to some degree, although some features are limited to the latest (beta) versions.
Please note that the browser is not the ideal place to perform heavy work like this, and thus pixel-level manipulating effects (like brightness/contrast, embossing, etc.) can take several seconds to perform, if not more. Performance varies a lot, though, and it only gets better with the newer browsers. Opera 9.5 Beta, FF3 and the latest WebKit nightlies all perform well, I think. Opera 9.27 is pretty slow, FF2 is "ok". Regular Safari 3.1.1 works fine as well, but lacks a few methods which unfortunately disables saving and many of the advanced effects. Apart from being significantly faster, several canvas-related issues have also been adressed in the betas, so I definitely recommend using those.
You can upload images either from your computer or from a URL (currently only from Flickr, Photobucket, Facebook and PicasaWeb), and you can save the edited image to your desktop or have a temporary URL generated. I don't have a whole lot of space on my host, so the temporary URLs are only valid for 5 minutes, just enough to post it to another site or what have you. When uploading, the file has to make a trip to pixastic.com before being served to the client since security restrictions prevent accessing image data from images outside pixastic.com. Also, when saving, the data is sent to pixastic.com and back. These two things are the only things that involve a bit of server side code, and it's more or less just sending images data back and forth.
One key feature that is missing right now is some sort of zoom functionality and scrolling in the image area. So until this is implemented, I've temporarily restricted the maximum image size to 1024x1024 (and 1MB, which also ensures that my server space is not filled up with giant images!)
If you're interested, my current todo list for this project is here. It also lists the bugs and issues I'm aware of. There are a couple of bugs that I don't know if I'll address, since they are not present when using the beta version of the browser in question.
There are a few shortcut keys you can (try to) use:
Ctrl+C, Ctrl+X, Ctrl+V performs copy/cut/paste on the currently selected image area.
Ctrl+Z : Undo (There are 10 levels of undo)
Alt+Backspace (or Ctrl+Backspace) fills the currently selected area.
The Ctrl+* keys do not work well in Opera, but you can do Ctrl+Shift+* instead.
What's with the nice/ugly/awesome/crappy GUI, you ask? Well, forever and a day ago I started working on a GUI framework, both for the experience and to have some sort of foundation on which to build a large browser game. The game is currently on hold while I do other things, but I decided to use the GUI part for this little project to see if it was actually usable. I've made a few stupid design decisions, and in its current state its a bit too bulky and sluggish, but I like making button controls and sliders, so I win anyway.
Check it out here, I've also put up a few sample images you can play with. Read more...
I wanted to see how far I could take the canvas image effects and the result, which is still very much a work in progress, is pixastic.com, a JavaScript/Canvas image editing application.
Now, it's not a complete photo manipulation and editing suite, capable of doing everything you need, nor does it aim to be that. There is no substitute for Photoshop. So, first and foremost Pixastic will be my playground for experimenting with image manipulation, and I suppose also a showcase of how the canvas element can be used to edit photos. Every bit of manipulation is done on the client side with no plugins, using just JavaScript and the functionality present in the canvas implementations of the supported browsers. Now, even if its primary goal is that of being a technical curiosity, I think it can also turn out a handy and usable tool if you have online photos or other images that need a quick edit of some sort.
Many typical transforms like cropping, resizing, rotating are available just as a variety of image filters allows standard adjustments and effects such as brightness/contrast, hue/saturation, grayscale, sepia toning, emboss, blur and so on. There are also some (very) simple drawing capabilities which I plan to expand in the future.
It has some obvious crossbrowser issues due to the usage of the canvas element, which is not available in Internet Explorer. Firefox, Opera and Safari all work to some degree, although some features are limited to the latest (beta) versions.
Please note that the browser is not the ideal place to perform heavy work like this, and thus pixel-level manipulating effects (like brightness/contrast, embossing, etc.) can take several seconds to perform, if not more. Performance varies a lot, though, and it only gets better with the newer browsers. Opera 9.5 Beta, FF3 and the latest WebKit nightlies all perform well, I think. Opera 9.27 is pretty slow, FF2 is "ok". Regular Safari 3.1.1 works fine as well, but lacks a few methods which unfortunately disables saving and many of the advanced effects. Apart from being significantly faster, several canvas-related issues have also been adressed in the betas, so I definitely recommend using those.
You can upload images either from your computer or from a URL (currently only from Flickr, Photobucket, Facebook and PicasaWeb), and you can save the edited image to your desktop or have a temporary URL generated. I don't have a whole lot of space on my host, so the temporary URLs are only valid for 5 minutes, just enough to post it to another site or what have you. When uploading, the file has to make a trip to pixastic.com before being served to the client since security restrictions prevent accessing image data from images outside pixastic.com. Also, when saving, the data is sent to pixastic.com and back. These two things are the only things that involve a bit of server side code, and it's more or less just sending images data back and forth.
One key feature that is missing right now is some sort of zoom functionality and scrolling in the image area. So until this is implemented, I've temporarily restricted the maximum image size to 1024x1024 (and 1MB, which also ensures that my server space is not filled up with giant images!)
If you're interested, my current todo list for this project is here. It also lists the bugs and issues I'm aware of. There are a couple of bugs that I don't know if I'll address, since they are not present when using the beta version of the browser in question.
There are a few shortcut keys you can (try to) use:
Ctrl+C, Ctrl+X, Ctrl+V performs copy/cut/paste on the currently selected image area.
Ctrl+Z : Undo (There are 10 levels of undo)
Alt+Backspace (or Ctrl+Backspace) fills the currently selected area.
The Ctrl+* keys do not work well in Opera, but you can do Ctrl+Shift+* instead.
What's with the nice/ugly/awesome/crappy GUI, you ask? Well, forever and a day ago I started working on a GUI framework, both for the experience and to have some sort of foundation on which to build a large browser game. The game is currently on hold while I do other things, but I decided to use the GUI part for this little project to see if it was actually usable. I've made a few stupid design decisions, and in its current state its a bit too bulky and sluggish, but I like making button controls and sliders, so I win anyway.
Check it out here, I've also put up a few sample images you can play with. Read more...
